How To Reupholster A Rocking Chair | For Beginners | Seat And Back | Cushion | With Springs
Step By Step Guide To Reupholster A Rocking Chair For Beginners
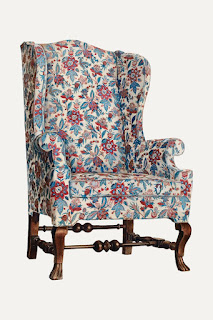
Is the worn-out back and seat of your cherished rocking chair getting to you? Do you yearn for the softness of a brand-new, spring-loaded cushion? Don't worry—restoring your rocking chair is simpler than you might imagine. We'll walk you through the process of reupholstering your rocking chair in this in-depth guide, bringing back its comfort and charm for years to come.
- Step 1: Evaluate the Situation
Your rocking chair's seat and back should be thoroughly inspected before beginning the reupholstering procedure. Make a note of any rips, stains, or spots where the cloth appears worn. In order to ascertain whether the cushion and springs require replacement or repair, you should also examine their state.
- Step 2: Assemble Your Supplies
Before starting this reupholstering project, you'll need to gather the following supplies:
- Fabric of your choice for the seat, seat and back, and cushion.
- Upholstery foam for padding.
- Springs (if needed).
- Upholstery tools: staple gun, scissors, pliers, and a screwdriver.
- Step 3: Take Out the Old Upholstery
Start by carefully removing the old fabric from the cushion, seat, and back. Gently remove the old upholstery by using a screwdriver to loosen any fasteners keeping the cloth in place. Take care not to injure the cushion or chair frame during the process.
- Step 4: Change the Springs and Cushion
It's time to replace the cushion on your rocking chair if it's worn out or no longer provides enough support. Take measurements of the seat's dimensions and cut the upholstery foam to suit the seat tightly. To ensure the best possible comfort and support, replace any broken or missing springs in the chair.
- Step 5: Upholster the Seat and Back
It's time to upholster the rocking chair's seat and back once you've set up the cushion and springs. Place the cushion on top of the flat, chosen cloth, making sure it is centred. Staple the fabric to the seat's underside after pulling it taut over the cushion. Make sure the cloth is wrinkle-free and smooth by repeating this process for the seat and back.
- Step 6: Secure the Fabric
After the fabric is firmly fastened to the seat and back, use scissors to neatly trim any extra material. To ensure an orderly and polished appearance, use pliers to remove any loose staples or tacks.
- Step 7: Put Your Rocking Chair Back Together
It's time to put your rocking chair back together now that the reupholstering is finished. Screws should be used to firmly fasten the cushion back onto the chair frame. Try rocking your chair gently to see how stable and comfortable it is.
- Step 8: Take Pride in Your Work
Take a step back and see how your rocking chair has changed. It will quickly become your favourite place to unwind in your house thanks to its brand-new seat and back as well as its spring-loaded cushion.
To sum up, reupholstering a rocking chair is a satisfying do-it-yourself activity that can revitalize an outdated piece of furniture. You can take pleasure in the comfort and beauty of your refurbished rocking chair for many years to come if you follow these instructions and put in a little time and work. So feel free to let your imagination go wild and give your rocking chair the makeover it so richly deserves!
How To Reupholster A Rocking Chair Cushion, Seat And Back?
Reupholstering a rocking chair's seat and back may breathe new life into the design and comfort of your cherished furniture piece, making it a satisfying do-it-yourself project. To get professional results, whether your goal is to update the style, repair damage, or simply refresh the upholstery, follow these steps:
- Set Up Your Workspace
Look for a roomy, well-lit space where you can work on your rocker in comfort. Put down a protective covering to shield your work surface or floor from harm.
- Assemble Your Supplies
Gather all the supplies and equipment required for the reupholstering procedure. A staple gun, scissors, pliers, a screwdriver, upholstery foam or padding, fabric for the seat and back, and any extra trims or embellishments you like are required.
- Eliminate Current Upholstery
Take great care to remove the existing fabric from the rocking chair's back and seat. Carefully remove the old upholstery by using a screwdriver to loosen any screws keeping it in place, being careful not to harm the chair structure.
- Examine the State
Consider the state of the back frame, seat, and any supporting structures or padding underneath. Before beginning the process of reupholstering, replace or repair any broken parts.
- Cut & Sew in New Fabric
After determining the seat and back measurements, cut your selected fabric, allowing a few inches extra on all sides. Place the seat and back cushions on top of the flattened fabric, making sure they are centred.
- Fasten the Fabric
Pull the fabric tightly over the cushion, beginning with the seat, and staple it to the chair frame's underside. As you proceed around the edge, pull the fabric taut to prevent wrinkling and equally space the staples. For the rocking chair's back, repeat these steps.
- Trim Excess Fabric
For a neat and polished appearance, use scissors to remove any extra material once the cloth is firmly in place. Make sure you leave enough fabric for a clean edge and to conceal the staples.
- Reassemble Your Rocking Chair
Use screws or other fasteners to reattach the seat and back cushions to the chair frame when the reupholstering is finished. To make sure everything is safe, check the rocking chair's comfort and stability.
- Optional Finishing Touches
To improve the aesthetic appeal of your freshly reupholstered rocking chair, feel free to add any decorative trimmings, buttons, or embellishments.
You may reupholster the seat and back of your rocking chair and turn it into a chic and cosy piece of furniture that you'll be happy to display in your house by following these instructions carefully and taking your time to ensure accuracy and attention to detail.
How To Reupholster A Rocking Chair With Springs?
Reupholstering a spring-loaded rocking chair ensures that your favourite seat becomes even cosier by adding an extra layer of comfort and support. Here's a step-by-step tutorial to assist you confidently take on this project:
- Set Up Your Workspace
Look for a roomy, well-lit space where you can work on your rocker in comfort. To protect your floor or work area from potential damage, lay down a protective covering.
- Assemble Your Supplies
Gather all the supplies and equipment required for the reupholstering procedure. A staple gun, scissors, pliers, a screwdriver, upholstery foam or padding, springs, and any extra trimmings or embellishments you choose are required. Fabric for the seat and back is also required.
- Eliminate Current Upholstery
Take great care to remove the existing fabric from the rocking chair's back and seat. Carefully remove the old upholstery by using a screwdriver to loosen any screws keeping it in place, being careful not to harm the chair structure.
- Evaluate the Springs
Check the state of the current springs. Take them out of the chair frame and replace them with fresh springs that are the right size and tension if they are worn out or broken.
- Prepare the Seat Frame
To guarantee that it can adequately hold the new upholstery and springs, fortify or repair the seat frame as needed. This could be glueing loose joints, tightening fasteners, or giving more support where it's needed.
- Cut & Sew in New Fabric
After determining the seat and back measurements, cut your selected fabric, allowing a few inches extra on all sides. Place the seat and back cushions on top of the flattened fabric, making sure they are centred.
- Attach the Springs
Using the new springs, place them uniformly across the surface of the seat frame. Make sure the springs are uniformly spaced and firmly in place by using a staple gun to attach them to the frame.
- Add Upholstery and Padding
To provide the springs support and cushioning, place upholstery foam or padding on top of them. Next, wrap the cut cloth over the springs and padding, pressing it taut and taping it to the chair frame's bottom.
- Trim Excess Fabric
For a neat and polished appearance, use scissors to remove any extra material once the cloth is firmly in place. Make sure you leave enough fabric for a clean edge and to conceal the staples.
- Reassemble Your Rocking Chair
Use screws or other fasteners to reattach the seat and back cushions to the chair frame when the reupholstering is finished. To make sure everything is safe, check the rocking chair's comfort and stability.
You can reupholster a rocking chair with springs and turn it into an opulent, comfy piece of furniture that you'll love for years to come by following these instructions and ensuring accuracy and attention to detail by taking your time.


Comments
Post a Comment