How To Clean Kitchen Cabinets | Greasy | Baking Soda | Vinegar | Before Painting
Cleaning Greasy Kitchen Cabinets Using Baking Soda & Vinegar
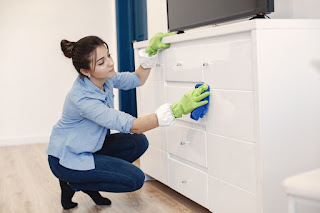
A recurring annoyance that takes away from the elegance and cleanliness of your kitchen is grease-covered cabinets. Thankfully, baking soda and vinegar are a potent combination that can remove even the most stubborn grease accumulation from your pantry. We'll look at how to use these everyday items' cleaning abilities to bring your kitchen cabinets back to life, leaving them spotless and grease-free, in this article.
- Examine the Grease
Before beginning the cleaning process, give your kitchen cabinets a quick inspection to determine how much grease has accumulated there. Is it a thin coating or a thick layer that won't go away? This will assist in figuring out just how thorough the cleaning needs to be.
- Gather Your Supplies
For this cleaning method, you'll need the following supplies:
- Baking soda
- White vinegar
- Dish soap
- Warm water
- Microfiber cloth or sponge
- Spray bottle
- Make Baking Soda Paste
To make a thick paste, first combine baking soda with a small amount of water. Because baking soda is a mild abrasive, it removes grease and dirt from cabinets without causing any surface damage.
- Apply the Paste
Cover the oily sections of your kitchen cabinets with the baking soda paste using a microfiber cloth or sponge. Pay particular attention to areas surrounding the stove and oven that have a lot of grease buildup. To help the paste get through the grease, let it sit for a few minutes.
- Apply Vinegar Solution
Pour equal amounts of white vinegar and water into a spray bottle. Vinegar is a great addition to baking soda for cleaning kitchen cabinets because it is a natural degreaser and disinfectant. Apply the vinegar solution to the parts of your cabinets that have been coated in baking soda paste.
- Gently Scrub
Work the baking soda paste and vinegar solution into the grease on the cabinets by using a clean microfiber cloth or sponge to gently scrub in circular motions. Baking soda and vinegar together will produce a foaming effect that aids in removing the grease and filth.
- Rinse and Dry
To get rid of any last bits of baking soda and vinegar residue, give the cabinets a good rinse under clean water once you've done your scrubbing. Wipe the cabinets down with a dry microfiber cloth to get rid of any extra moisture. Your cabinets will seem clean and shining after doing this, and water stains won't appear.
- Finish with Dish Soap (Optional)
Wipe down the cabinets one last time after adding a tiny amount of dish soap and warm water to give them an extra layer of cleanliness and a new aroma. This will guarantee that all traces of grease and residue are eliminated.
In conclusion, using vinegar and baking soda to clean dirty kitchen cabinets is an extremely efficient and environmentally friendly method that will make your cabinets look like new. You can eliminate oil and dirt from your kitchen and create a hygienic and welcoming cooking area for you and your family by following these easy steps and utilizing ordinary home products. Now that you have your vinegar and baking soda, let's get cleaning!
When to Clean Your Kitchen Cabinets?
To save time and effort, we suggest using a two-part cleaning procedure for kitchen cabinets that includes weekly and seasonal touch-ups.
- Weekly
Spot cleaning is the greatest method for keeping kitchen cabinets clean, as opposed to regularly wiping them off. Simply mist a microfiber cloth with a multi-purpose cleaner to remove fingerprints, splatters, and other stains. Don't forget to sanitize the hardware.
- Seasonally
Deep clean your cabinets three or four times a year. Remove everything from the cabinets to accomplish this. Next, use a mild cleanser to dab a microfiber cloth. Clean the door's exterior and interior, as well as the shelves. Treat the corners and any other small spaces with a freshly cleaned toothbrush. Allow to dry fully before adding more.
How to Clean Kitchen Cabinets That Are Stained?
Various objects and substances reside in your cabinets. They are also heavily used daily. Here's how to clear the most prevalent stains from kitchen cabinets.

- Fingerprints
The greasy residue from fingers can leave hardware and cabinet doors looking unattractive. Fingerprints can be readily removed from kitchen cabinets by cleaning them with vinegar. After soaking a towel in a 50/50 vinegar and water solution, apply it to the prints and use a polishing cloth to buff them clean.
- Grease
Grease stains are especially common in cabinets that are directly over the stove. However, grease from kitchen cabinets can be easily cleaned. Diluted vinegar can be used to clean greasy kitchen cabinets, just like it can clear oil-based fingerprints. To completely remove grease off cabinets, you may need to repeat the technique multiple times because these stains are probably larger than a fingerprint.
- Food splatters
Perhaps an accidental ketchup squirt or a countertop spill that seeped into the base cabinets. In any case, use a moist towel to quickly clean up food spills before using baking soda to clean kitchen cabinets. This is particularly valid when dealing with porous materials, such as wood. Don't allow the stain to become entrenched. Next, cover the area with a paste made from baking soda and water. After a few minutes of sitting, remove with a cloth. Utilizing a fresh cloth, buff the region.
- Water stains
When cleaning kitchen cabinets, water stains can be a regular issue if your water is hard. Whenever you clean your cabinets, use distilled water instead of tap water to avoid water marks.
- Scuffs
Use a gentle eraser to remove scuffs left by chairs, tables, or shoes. After lightly rubbing the eraser over the spot, use a fresh cloth to remove any leftover residue. This is a particularly useful tip for cleaning white kitchen cabinets.
How to Clean Kitchen Cabinets That Are Painted?
To properly remove oil and grime from painted kitchen cabinets without ruining the finish, a delicate approach is necessary. The following is a step-by-step approach to securely cleaning painted kitchen cabinets:
- Examine the Cabinets
Look closely at your painted cabinets to find any places with stains, dirt, or grease buildup before you start cleaning. You can use this assessment to choose the cleaning technique that will work best for your unique requirements.
- Gather Your Supplies
You'll need the following supplies for cleaning painted kitchen cabinets:
- Mild dish soap or a gentle all-purpose cleaner
- Warm water
- Microfiber cloths or soft sponges
- Bucket or basin
- Optional: White vinegar or baking soda for tougher stains
- Create a Cleaning Solution
To make a cleaning solution, combine a small quantity of warm water and mild dish soap or all-purpose cleaner in a bucket or basin. Steer clear of abrasive cleansers and aggressive chemicals since they can harm your cabinets' paint finish.
- Test in an Inconspicuous Area
To make sure your cleaning solution won't harm or discolour the paint, test it on a tiny, discrete section of the cabinet before beginning to clean the full surface.
- Wipe Down the Cabinets
To clean the cabinets, wring off any extra liquid by dipping a microfiber cloth or soft sponge into the cleaning solution. Working in little areas at a time, carefully clean the painted cabinets. To prevent scratching or causing damage to the paint, apply gentle pressure.
- Focus on Greasy sections
The sections of the cabinets that are prone to collecting grease, like the vicinity of the stove or oven, should receive extra attention. You can boost the cleaning effectiveness of your solution by adding a tiny amount of baking soda or white vinegar if you have grease stains that are difficult to remove.
- Rinse and Dry
To get rid of any soap residue, give the cabinets a thorough rinse with clean water after cleaning. To fully dry the cabinets, use a different towel or microfiber cloth because too much moisture can eventually deteriorate the paint job.
- Spot Treat Stains
You can use a paste made of baking soda and water to spot treat any stains or blemishes that are particularly difficult to remove from the painted cabinets. After applying the paste and letting it stay for a few minutes, gently scrub the soiled area with a soft cloth or sponge before rinsing.
- Finish with a Protective Coating
After cleaning, think about putting a small layer of furniture wax or shine on your cabinets to preserve the paint finish and keep them looking their best. This will improve the painted surface's sheen and offer a barrier of defence.
- Maintain frequent Cleaning
Try to use the mild cleaning technique mentioned above to clean your painted kitchen cabinets on a frequent basis to avoid grease and dirt accumulation. Your cabinets will continue to appear gorgeous and new for many years with regular upkeep.
Do's and Don'ts of Cleaning Kitchen Cabinets
- To lessen the need for a deeper cleaning, dust your cabinets at least once every two weeks using a soft cloth, rag, or ordinary duster.
- Do use a damp towel or sponge to mop up spills as soon as they occur. The longer a chemical remains on your cabinets, the more likely it is to create damage and difficult-to-remove stains.
- When a self-cleaning oven is in the cleaning cycle, avoid keeping the cabinets and drawers close together. The tremendous heat that might escape from a defective heat gasket seal can cause damage to nearby cabinets. If at all feasible, open or remove the drawers and doors from any cabinet that is next to or above the oven when cleaning in order to prevent this.
- Appliances that produce heat, such as toasters, air fryers, and coffee makers, should be kept away from cabinets since the extra heat and moisture can harm the surface of the cabinets.


Comments
Post a Comment