How To Reupholster A Chair | Step-by-Step | Cushioned Seat | Seat & Back | Chair With An Arm | Studs | Piping | Buttons
Reupholstering Your Chairs
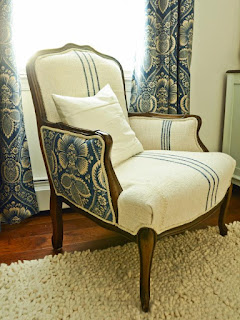
Reupholstering is considered one of the best ways to give a fresh, updated look and breathe new life into your worn-out chair that otherwise looks drab and outdated. If you are tired of seeing your chair looking worn out and want to give it a fresh and updated look, then you are at the right place. Here, we will guide you through the step-by-step reupholstering process. Whether you are looking to reupholster a chair with a cushioned seat, seat and back, or a chair with an arm, this tutorial will help you with the process, complete with options such as studs, piping and buttons to suit your style preference.
Can you reupholster over existing fabric?
- Putting new upholstery over an existing one may look like a very easy and quick way, however, this is usually considered a bad idea due to some reasons. If you put new upholstery over an old one, it generally makes the chair look bulkier. If the original upholstery fabric is dirty, the new fabric may become stained, particularly if greasy spills have occurred.
- If you are sure that your chair is in good condition it is only a few years old and you are just looking to update the fabric for a makeover-then it is a better option to use a colourful slipcover instead of reupholstering your chair, which you can create on your own or by hiring a professional upholstery maker. A slipcover can be a great option when you are sure that the frame and its components are in good condition.
Step By Step Reupholstering Process
- Assess the chair
Before you start the reupholstering process, first of all, inspect your chair with utmost care. Check the current condition of the chair, look for any damage and see what type of upholstery it has. Assessing the chair will ultimately help you in determining the materials you will need and the level of work required.

- Gather Your Materials
Entirely dependent on the type of chair and the appearance you are looking to achieve, you will need numerous types of material, such as the following:
- Fabric
- Foam padding
- Batting
- Upholstery Tacks
- Studs
- Piping
- Buttons
- A Staple gun
It is important to opt for high-quality materials that will resist and stand firm against everyday use.
- Remove the Old Upholstery
After assessing the chair and gathering the required materials, now, it is time to remove the existing upholstery from the chair carefully. You can remove the fabric from the chair with utmost care using a seam ripper or a pair of sharp scissors, making sure not to damage the frame or padding underneath. If your chair has studs or piping, it is important to take note of their placement for later reference.

- Replace the Padding
Now, you have to replace the padding, if it is worn out or damaged. To fit the chair's seat and back, cut fresh foam padding, ensuring a snug and comfortable fit. If you would like more cushioning, add more batting layers.

- Cut and Attach the New Fabric
Select the fabric of your choice and lay it out before carefully measuring and cutting it to size, providing a few extra inches on each side to wrap around the frame of the chair. If you are going to add studs, piping, and buttons, it's time to weave them into the fabric now.

- Upholster the Chair
Now, it is time for the main part of the process: upholstering the chair. Start upholstering with the seat or backrest, extend or spread the fabric over the padding carefully and attach it firmly to the frame with the help of a staple gun. Next, proceed around the chair, stretch the fabric tightly and staple it in place as you go. Be especially mindful of curves and corners, making sure of a smooth and professional finish.

- Add the Finishing Touches
As soon as you have securely attached the fabric, cut away any unneeded items, then add any more details such as studs, piping, or buttons. Insert studs or piping around the edges with upholstery tacks, or sew buttons in place for a tufted effect.
- Reattach the Chair Components
With the upholstery complete, reattach any extra parts such as seat cushions or armrests. Make sure everything is securely attached and that the chair is stable as well as comfortable to sit on.
- Enjoy Your Newly Upholstered Chair
Take a bow and enjoy the effort you've made! Your freshly reupholstered chair is now prepared to occupy a prominent spot in your house. Sit back, relax, and enjoy the comfort as well as style of your revamped furniture piece.


Comments
Post a Comment