How To Refinish A Rocking Chair | Strip | Refinish | Rocking Chair
What Is A Rocking Chair?
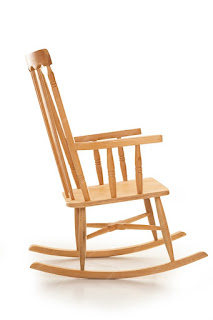
The distinctive feature of a rocking chair is its curved legs, which enable it to rock back and forth in a rhythmic, calming manner. It usually consists of two curved bands that allow for pivoting and swaying, called rockers, that are fastened to the bottom of the chair legs. A high backrest and armrests are common features of rocking chairs, which makes them comfortable options for reading, nursing, or just taking in soft motion. To accommodate a wide range of interests and preferences, they are available in a multitude of styles, materials, and patterns, from classic wooden models to contemporary upholstered variants.
Step-By-Step Guide To Strip and Refinish a Rocking Chair
Restoring a worn-out rocking chair may be a very fulfilling project that allows you to express your creativity and craftsmanship while giving new life to a treasured piece of furniture. With the help of this in-depth tutorial, you will get the skills and knowledge necessary to carefully disassemble and refinish a rocking chair, regardless of your level of experience doing do-it-yourself projects.
Step 1: Evaluating the Condition of the Chair
Examine the rocking chair attentively to determine its condition before beginning the restoration process. Note any wear and tear, dents, or cracks that will need to be fixed throughout the refinishing process. This preliminary evaluation will assist you in creating a strategy and guarantee that you take care of any required repairs before moving forward.
Step 2: Assemble Your Equipment and Supplies
To achieve professional-quality results, assembling the necessary tools and supplies is a necessary part of preparing for a rocking chair restoration. Important things consist of:
- Paint stripper or varnish remover
- Sandpaper in various grits (coarse to fine)
- Wood stain or paint
- Brushes, sponges, or rags for application
- Protective gear (gloves, safety glasses, and a mask)
- Wood filler for repairing any imperfections
- Finish (polyurethane, lacquer, or wax) for sealing and protecting the wood
Step 3: Removing the Finish
Strip the rocking chair's previous finish to start the restoration process. Apply a thick layer of paint remover or varnish remover on the surface, paying close attention to the manufacturer's instructions. After letting the stripper work its way through the finish, usually for 15 to 30 minutes, use a scraper or putty knife to carefully remove the paint or varnish layers that have weakened.
Step 4: Even out and sand
After removing the previous finish, sanding the rocking chair's surface is the next step. To smooth out any irregularities in the wood and remove any last remnants of the previous finish, start with coarse-grit sandpaper. Until the surface is consistently smooth to the touch, work your way down to finer grits. To prevent sanding swirls or scratches, be sure to sand with the grain of the wood.
Step 5: Repairing Imperfections
Once the surface has been smoothed, check the rocking chair for any lingering flaws like holes, dents, or fractures. To fill in these spaces, apply wood filler according to the product's application and drying time directions. After the filler has solidified, sand the parts that have been mended so they fit in perfectly with the surrounding wood.
Step 6: Applying the Finish
The exciting part is about to begin: giving the rocking chair a new finish to improve its durability and aesthetic appeal. Make sure the surface is dust-free and clean before starting, regardless of whether you want to paint the wood to match your decor or stain it for a more natural appearance. For best results, apply the finish evenly using a brush, sponge, or rag, going with the grain of the wood. For a smooth, polished appearance, softly sand in between applications after allowing the finish to completely dry.
Step 7: Sealing and protecting
The freshly refinished rocking chair needs to be sealed and protected after the last coat of finish has dried. To preserve the wood from stains, scratches, and moisture, apply a coat of polyurethane, lacquer, or wax, depending on your desire and the type of finish employed. Prior to using the rocking chair, adhere to the manufacturer's application and drying time recommendations and let the finish completely cure.
In conclusion, congrats! Your rocking chair has been successfully stripped and refinished, taking it from worn out and dingy to gorgeous and revitalized. You've improved your abilities as a do-it-yourself restorer in addition to bringing new life to a piece of furniture by according to these detailed instructions, being patient, and paying close attention to details. Now take a seat, unwind, and enjoy the results of your hard work as you rock away on your tastefully restored masterpiece.
Advantages & Disadvantages Of A Rocking Chair
Advantages
- Relaxation: A rocking chair's gentle rocking motion can promote calmness and relaxation, which makes it the perfect place to unwind after a demanding day or put a fussy baby to sleep.
- Stress Reduction: Research has demonstrated that rocking can ease tension, lower body temperature, and foster comfort and well-being.
- Comfort: Supportive armrests, padded seats, and backrests are just a few of the ergonomic features that make many rocking chairs extra comfortable to use for prolonged periods.
- Versatility: Rocking chairs offer adaptable seating options for a range of activities and tastes and can be utilized in living rooms, bedrooms, nurseries, and outdoor areas.
- Therapeutic advantages: Research has linked the rhythmic motion of rocking to a number of health advantages, including better posture, increased circulation, and alleviation of back pain and arthritis.
Disadvantages
- Limited Mobility: Although the rocking motion can be soothing, people with balance problems or mobility challenges could find it unsuitable as it takes a certain level of coordination and stability to operate safely.
- Space Requirements: Because of their rocking mechanism, rocking chairs usually take up more floor area than other types of chairs, making them more difficult to install and manoeuvre.
- Noise: Some users find it unpleasant when rocking chairs make creaking or squeaking noises over time, especially in calm situations. This is dependent on the design and construction of the chair.
- Maintenance: To maintain rocking chairs in top shape, just like any other piece of furniture, they need to be cleaned, have screws and bolts tightened, and occasionally have moving components lubricated to stop wear and tear.
- Style Restrictions: Although rocking chairs are available in a variety of shapes and designs, some people may find that they don't match certain décor themes or aren't as visually pleasing as other seating furniture.


Comments
Post a Comment