How To Stain Wood Furniture | Black | White | Darker | Lighter | That's Already Stained | Without Sanding
Mastering the Art of Staining Wood Furniture: A Comprehensive Guide
Wooden furniture has a timeless appeal,
adding warmth as well as character to any space. However, when it comes to
getting the perfect stain, it can be a very challenging task, particularly when
aiming for specific shades like black or white.
Whether you want to darken your furniture, lighten it, or refresh a piece of
furniture that's already stained, you don’t need to worry! In this
comprehensive guide, we'll explore the possibilities of staining wood furniture
without sanding, making sure of a flawless finish every time.
Understanding the Basics of Staining
Prior to beginning the staining procedure,
it's important to understand the fundamentals. Staining usually consists of
applying a pigmented liquid to wood, further improving its colour while
preserving the natural grain. Unlike paint, which
creates a surface layer of protection, stain
penetrates the wood, giving it a more nuanced appearance.
Choosing the Right Stain
Selecting the appropriate stain is
extremely important when it comes to obtaining your desired result. For those
seeking a darker hue, go for an oil-based stain with rich
pigmentation. Conversely, water-based stains are ideal for obtaining a lighter finish
or when working with lighter woods including pine or maple. Consider the
existing colour of the wood when you make your stain selection.
Preparing the Surface
While conventional wisdom states that sanding must be done before staining,
there are methods to bypass this step. Begin by rigorously & meticulously
cleaning the surface of the furniture with the help of a mild detergent and
water. Ensure all dirt, grease, as well as grime, are eliminated, since they can affect the stain's adherence. Once dry, lightly scuff the
surface with the help of a fine-grit sandpaper to promote better absorption.
Staining Techniques for Different Effects
Achieving a Darker Finish
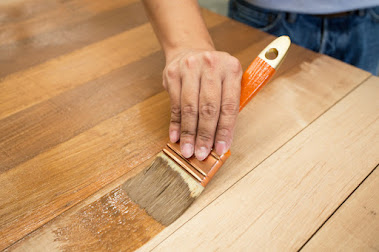
For those looking for a darker stain, take
into consideration layering multiple coats to intensify the colour. Start the
process by applying a single coat of your chosen stain with the help of a brush
or cloth, following the wood grain. Allow it to penetrate for several minutes
and wipe off any excess with a clean cloth. Repeat this process, applying
additional coats as long as the desired depth of color is achieved.
Lightening the Wood
Conversely, lightening a piece of furniture needs a
different approach. Start by diluting your chosen stain with water or a wood
conditioner to minimize its intensity. Apply the diluted stain in thin, even
coats, slowly building up the colour as long as the desired lightness is
attained. Remember to test the mixture on a small, unnoticeable area beforehand
to ensure satisfactory results.
Refreshing Existing Stains
If you want to refresh a piece of furniture that's already
stained, take into consideration using a tinted wood finish or gel stain. These
products offer excellent coverage and can rejuvenate faded or worn surfaces
easily. Simply apply the product with the help of a brush or cloth,
as per the manufacturer's instructions for best results.
Final Touches and Maintenance
Once the staining process is done and dusted, allow the
furniture to dry rigorously & meticulously before applying a clear topcoat
for added protection. Select & go for a finish that complements your stain
and offers the desired level of sheen, such as matte, satin, or gloss. Regular
maintenance, such as dusting and occasional reapplication of the topcoat, will
make it certain that your stained furniture retains its beauty for years to
come.


Comments
Post a Comment