How To Apply Polyurethane To Wood Table | Oil-Based Polyurethane | Water-Based Polyurethane
A Comprehensive Guide to Applying Polyurethane to Wood Tables
Polyurethane, a versatile and durable finish, acts as the finishing touch when it comes to enhancing the beauty as well as the longevity of wood tables.
At https://www.furniturewiki.com/,
we understand how critical it is to get the perfect finish on your wooden furniture.
In this guide, we'll walk you through the methodical procedure of applying
polyurethane (Oil-Based & Water-Based) to your wood table, guaranteeing an outcome of the highest calibre that will endure the test of time.
Preparing Your Workspace
Prior to starting the application of polyurethane,
it's extremely important to set up your workspace properly. Here's what you'll
need:
Materials
- Polyurethane:
Choose between oil-based or water-based polyurethane, which is entirely
dependent on your preference and the desired finish.
- Sandpaper:
Opt for a variety of grits, such as coarse, medium, and fine, in order to
ensure a smooth surface.
- Tack
Cloth: Use to get rid of dust and debris from the wood surface before you
apply polyurethane.
- Brushes
or Applicators: Select high-quality brushes or applicators right or
appropriate for the type of polyurethane you're using.
- Protective
Gear: Wear gloves, goggles, and a mask to keep yourself protected from
fumes and chemicals.
- Ventilation:
Ensure adequate ventilation in your workspace in order to reduce exposure
to harmful fumes.
Step 1: Sanding the Surface
Start the process by sanding the wood table, which will help to create a smooth as well as even surface for the polyurethane application. Begin with a coarse-grit sandpaper to eradicate any existing finish or imperfections. Gradually progress to finer grits as long as the surface feels smooth to the touch.
Step 2: Cleaning the Surface
After you are done with sanding, use a tack cloth to eliminate any dust and debris from the surface of the wood table. It's essential to have a clean workspace in order to achieve a flawless finish.
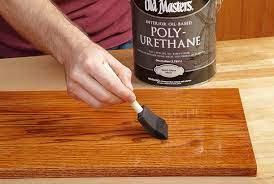
Step 3: Applying the Polyurethane
Now, you can apply the polyurethane to your wood table.
Follow these steps for the best results:
Oil-Based Polyurethane
1.
Stir the polyurethane thoroughly &
meticulously to ensure an even consistency.
2. With the help of a high-quality brush or applicator,
put on a little layer or coat of polyurethane in
the direction of the wood grain.
3.
Allow the first coat to dry completely in
accordance with the manufacturer's instructions.
4.
Lightly sand the surface with the help of fine-grit
sandpaper to smooth out any imperfections.
5. Apply subsequent coats of polyurethane, making
sure to sand between each coat for optimal adhesion and smoothness.
6.
Allow the final coat to dry completely before you
can handle or use the wood table.
Water-Based Polyurethane
1.
Shake the polyurethane container well in order to
mix the contents.
2.
Apply a thin, even coat of polyurethane with the
help of a high-quality brush or applicator.
3.
Allow the first coat to dry completely and then
you can apply additional coats.
4. In contrary to oil-based polyurethane,
water-based polyurethane dries quickly, therefore, work efficiently to avoid
brush marks.
5.
Sand lightly between coats when it comes to a
smooth finish.
6.
Allow the final coat to dry thoroughly &
meticulously before using the wood table.
Step 4: Finishing Touches
As soon as the polyurethane has dried completely, inspect &
examine the wood table to look for any imperfections or unevenness. If
necessary, lightly sand the surface with the help of fine-grit sandpaper and
apply an additional coat of polyurethane for a flawless finish.
Conclusion
Applying polyurethane to a wood table is an easy &
rewarding DIY process that results in a beautiful as well as durable finish. By
following the steps mentioned above in this guide, you can achieve
professional-quality results and lengthen the lifespan of your wooden furnishings.
At https://www.furniturewiki.com/,
we're dedicated to helping you achieve the perfect finish for your
woodworking projects.


Comments
Post a Comment